GE Washer Repair Guide: Troubleshooting Tips and Techniques

A malfunctioning washer can disrupt your daily routine and cause inconvenience, but with the right troubleshooting techniques, you can diagnose and resolve common issues efficiently. By understanding the inner workings of your GE washer and knowing how to troubleshoot, you can save time, money, and the hassle of calling in a professional. Join us as we explore the essential troubleshooting tips and techniques to get your GE washer back up and running smoothly. In this comprehensive guide, we delve into the world of GE washer repair, highlighting the importance of troubleshooting.
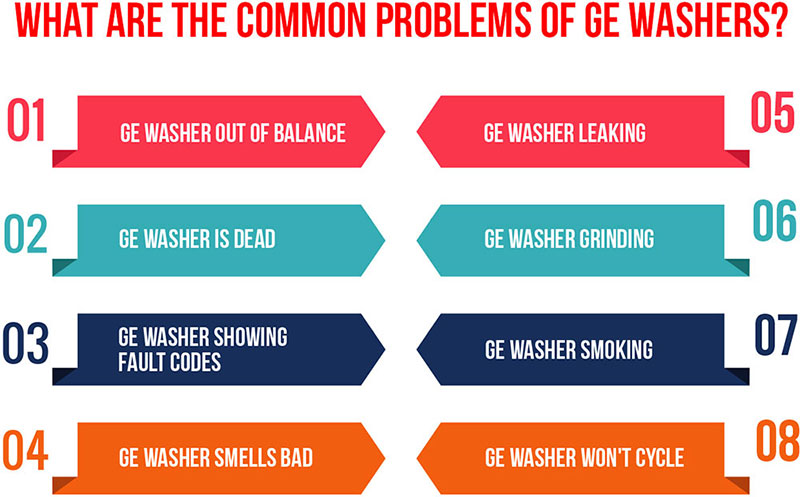
What are the Common Problems of GE Washers?
1. GE Washer Out of Balance
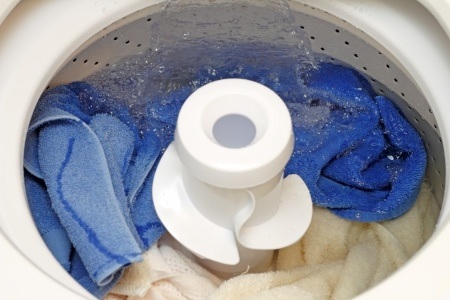
Experiencing an out-of-balance GE washer can be frustrating and may result in inefficient cleaning or even damage to the machine. When your washer wobbles or shakes excessively during a cycle, it’s a clear indication of an imbalance issue. In this section, we will explore the possible causes of an out-of-balance washer, such as overloading, uneven loads, or worn-out suspension rods. Additionally, we’ll provide step-by-step troubleshooting techniques to help you resolve this common problem and restore the stability and efficiency of your GE washer.
2. GE Washer is Dead
If your GE washer shows no signs of life or fails to start altogether, it can be a frustrating experience. In this section, we’ll delve into the potential reasons behind a “dead” washer, including power supply issues, faulty door switches, or electronic control board problems. We’ll guide you through a systematic troubleshooting process to identify the root cause and provide practical solutions to revive your GE washer and get it back to its working condition.
3. GE Washer Showing Fault Codes
When your GE washer displays an error or fault code, it serves as a diagnostic tool to indicate specific issues. Understanding these fault codes can help you identify the problem and take appropriate action. In this section, we’ll explain the meaning of common fault codes in GE washers and discuss their possible causes. With our troubleshooting tips, you’ll be equipped to decipher the error codes and implement the necessary repairs or adjustments to resolve the issues.
4. GE Washer Smells Bad
A foul odor emanating from your GE washer can be unpleasant and may affect the cleanliness of your laundry. This section will address the potential causes of bad smells in your washer, such as mold or mildew buildup, clogged drain pipes, or improper cleaning practices. We’ll provide you with effective cleaning techniques and maintenance tips to eliminate the odor and ensure a fresh-smelling and hygienic washing machine.
5. GE Washer Leaking
If you notice water pooling around your GE washer or find damp spots on the floor, it indicates a leaking issue that needs attention. Leaks can stem from various sources, including faulty hoses, damaged seals, or worn-out components. In this section, we’ll guide you through the troubleshooting process to identify the source of the leak and provide step-by-step instructions on how to fix it, ensuring a leak-free washing experience.
6. GE Washer Grinding
A grinding noise coming from your GE washer during operation is a cause for concern. This section will explore the potential reasons behind the grinding sound, such as worn-out bearings, a malfunctioning motor, or foreign objects stuck in the drum. We’ll outline the necessary troubleshooting steps to diagnose and resolve the grinding issue, helping you restore the smooth and quiet operation of your GE washer.
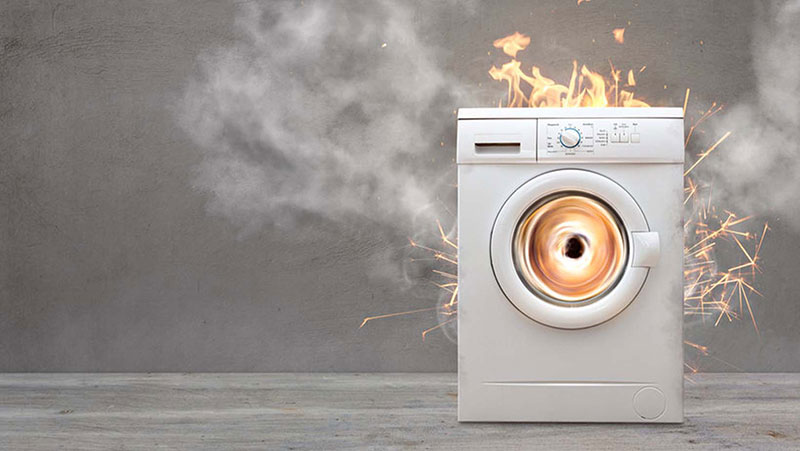
7. GE Washer Smoking
If you notice smoke or burning smells coming from your GE washer, it’s essential to address the issue promptly to prevent any potential hazards. This section will discuss the possible causes of a smoking washer, including electrical problems, overheating components, or friction between moving parts. We’ll provide safety guidelines and troubleshooting techniques to help you resolve the smoking issue and ensure the safe and efficient operation of your GE washer.
8. GE Washer Won’t Cycle
When your GE washer fails to go through the complete wash cycle or gets stuck in a specific stage, it can disrupt your laundry routine. This section will explore the potential causes of a washer that won’t cycle, such as faulty timers, defective control boards, or issues with water inlet valves. We’ll walk you through the troubleshooting process, offering practical solutions to get your GE washer back on track and functioning as intended.
GE Washer Troubleshooting Techniques
Troubleshooting Techniques for Common Problems with GE Washers:
1. Washer Out of Balance
Check the load balance: Ensure that the clothes are evenly distributed inside the drum. Large or heavy items should be placed opposite each other to maintain balance.
Inspect the suspension system: Examine the suspension rods or springs that support the drum. Look for signs of damage or wear and replace if necessary.
Level the washer: Use a level tool to check if the washer is sitting evenly on the floor. Adjust the leveling feet as needed to stabilize the appliance.
Test the shock absorbers: If your GE washer has shock absorbers, test them for proper functionality. Replace any worn or faulty shock absorbers.
2. Washer is Dead
Check the power supply: Ensure that the washer is properly plugged into a functioning power outlet. Test the outlet with another device to confirm if it’s working.
Examine the power cord: Inspect the power cord for any visible damage or loose connections. If damaged, replace the cord with a new one.
Test the lid switch: If the washer doesn’t respond at all, the lid switch might be faulty. Use a multimeter to check for continuity and replace the switch if necessary.
Verify control board operation: In some cases, a malfunctioning control board can cause the washer to appear dead.
3. Showing fault codes
Identify the fault code: Refer to the GE washer’s user manual to understand the meaning of the specific fault code displayed. Each code corresponds to a particular issue.
Check for common causes: Many fault codes are triggered by common problems such as clogged filters, water inlet valve issues, or door lock problems.
Follow the recommended steps: The user manual typically provides a list of steps to troubleshoot each fault code. Follow these instructions to identify and resolve the underlying issue.
Consult professional help: If you are unable to determine the cause or resolve the fault code, it is advisable to seek assistance from a qualified technician.
4. Washer Smells Bad
Clean the drum and gasket: Regularly clean the drum and rubber gasket around the door to remove any residue or mildew. Use a mild detergent and a soft cloth or sponge.
Run a cleaning cycle: Some GE washers have a dedicated cleaning cycle. Follow the user manual instructions to run this cycle with a washer cleaner or a mixture of vinegar and baking soda.
Check the drain hose: Ensure that the drain hose is properly installed and not clogged. A clogged or improperly installed hose can cause stagnant water and unpleasant odors.
Use proper detergent: Use the recommended amount and type of detergent for your GE washer. Excess detergent can create a buildup and contribute to odors.
5. Washer is Leaking
Inspect the water supply connections: Check the water inlet hoses for any leaks or loose connections. Tighten or replace the hoses as necessary.
Examine the drain hose: Ensure that the drain hose is securely attached and not damaged. Look for any cracks or tears that may cause leaks.
Check the door seal: Inspect the rubber door seal for signs of damage or deterioration. Replace the seal if it’s worn out or torn.
Clean the detergent dispenser: A clogged detergent dispenser can cause overflow and leaks. Remove the dispenser tray and clean it thoroughly before reinserting.
6. Washer is Grinding
Check for foreign objects: Inspect the washer drum and agitator for any foreign objects that may be causing the grinding noise. Remove any obstructions carefully.
Examine the agitator: Inspect the agitator for signs of wear, cracks, or misalignment. Tighten or replace the agitator if necessary.
Verify the drive belt: Inspect the drive belt for wear, cracks, or fraying. Replace the belt if needed.
Check the motor coupling: Inspect the motor coupling for damage or wear. Replace it if necessary.
Examine the bearings: Manually rotate the drum and listen for unusual sounds. In case you see damaged or worn-out then you will have to replace them.
7. Washer Smoking
Stop the washer: If you notice smoke coming from the washer, immediately stop the cycle and unplug the machine to prevent any potential hazards.
Check for foreign objects: Inspect the drum and pump for any foreign objects, such as small garments or debris, which may be causing friction and generating smoke. Remove any obstructions carefully.
Examine the motor: A malfunctioning motor can cause excessive heat and smoke. Inspect the motor for any signs of damage, overheating, or burning smells. If the motor is faulty, it may need to be replaced by a professional technician.
Verify the belt condition: A worn or damaged drive belt can cause excessive friction and overheating. Inspect the belt for any signs of wear, cracks, or slipping. Replace the belt if necessary.
8. Washer Won’t Cycle
Check power supply: Ensure that the washer is properly connected to a functioning power outlet. Test the outlet with another device to confirm if it’s working correctly.
Inspect the control panel: Examine the control panel for any error codes or indications of malfunction. To reset the washer, unplug it for a short while and then plug it back in. Now restart the cycle.
Verify the door/lid switch: If the washer won’t start the cycle, the door or lid switch may be faulty. Check if the switch is functioning properly by testing for continuity with a multimeter. Replace the switch if necessary.
Examine the timer/control board: Inspect the timer or control board for any visible damage, loose connections, or burnt components. Consult the user manual or contact a professional technician for further troubleshooting and potential replacement.
GE Washer Repair Techniques
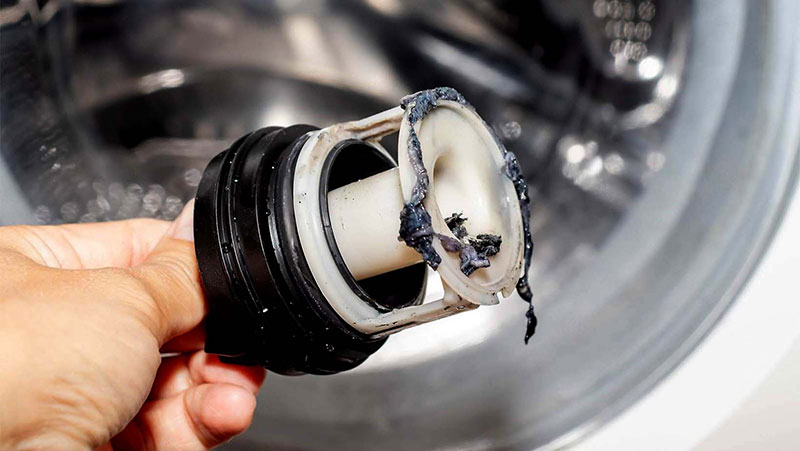
1. Replacing a Faulty Drain Pump
- Unplug the washer directly from the power source and then stop the water supply.
- Locate the drain pump, usually at the bottom of the washer.
- Disconnect the hoses and wires connected to the pump, taking note of their positions.
- Remove any mounting screws or clips securing the pump in place.
- Install the new drain pump by reversing the steps above, ensuring proper hose and wire connections.
- Test the washer to confirm that the new drain pump is functioning correctly.
2. Fixing a Broken Belt
- Unplug the washer and access the back panel or remove the top panel, depending on the model.
- Locate the drive belt, usually found around the drum and motor pulleys.
- Loosen or remove any tensioning devices, such as a belt tensioner or motor bracket.
- Slide the old belt off the pulleys and remove it from the washer.
- Install the new belt by fitting it onto the pulleys, following the appropriate routing pattern.
- Adjust the tension as necessary, ensuring the belt is snug but not overly tight.
- Reassemble the washer, ensuring all panels and components are securely in place.
When to Consult a Professionals/Technicians/Experts
While many issues with your GE washer can be resolved through troubleshooting and DIY repairs, there are instances when it’s best to consult a professional technician. Some issues, such as complex electrical problems, repairs, warranty issues, or intricate internal component replacements, may be best handled by qualified professionals with specialized knowledge and tools.
If there is any other problem you have with your GE Washer, or you need a GE Washer Repair, you can contact Appliance Medic at 201-589-2399 or 845-617-1111. Appliance Medic brings extensive repair experience and a commitment to excellence. Our skilled team of factory-trained technicians utilizes superior tools and premium materials for precise GE Washer repair. We specialize in washer repairs, serving New Jersey and New York. With our unwavering dedication to workmanship and customer satisfaction, trust Appliance Medic for unparalleled results and personalized service.